Solutions
Solutions represent scenarios you create following the structural pattern as defined by the Solution Template. When you create a new solution, information relating to scenario elements and security settings are extracted from the solution template. Although you cannot create a new scenario element or delete an existing one, you can configure the existing ones through Solutions.
You can also add or remove security settings and customize the elements based on partner’s servers. These changes will be reflected in the configuration.json file. Additionally, you can also create a new subscription, define the subscription type, and blacklist any events that should not be received by a partner. With Named Mapping, you can also change the file-name under certain conditions.
Creation
To create a Solution, you have to do the following steps:
-
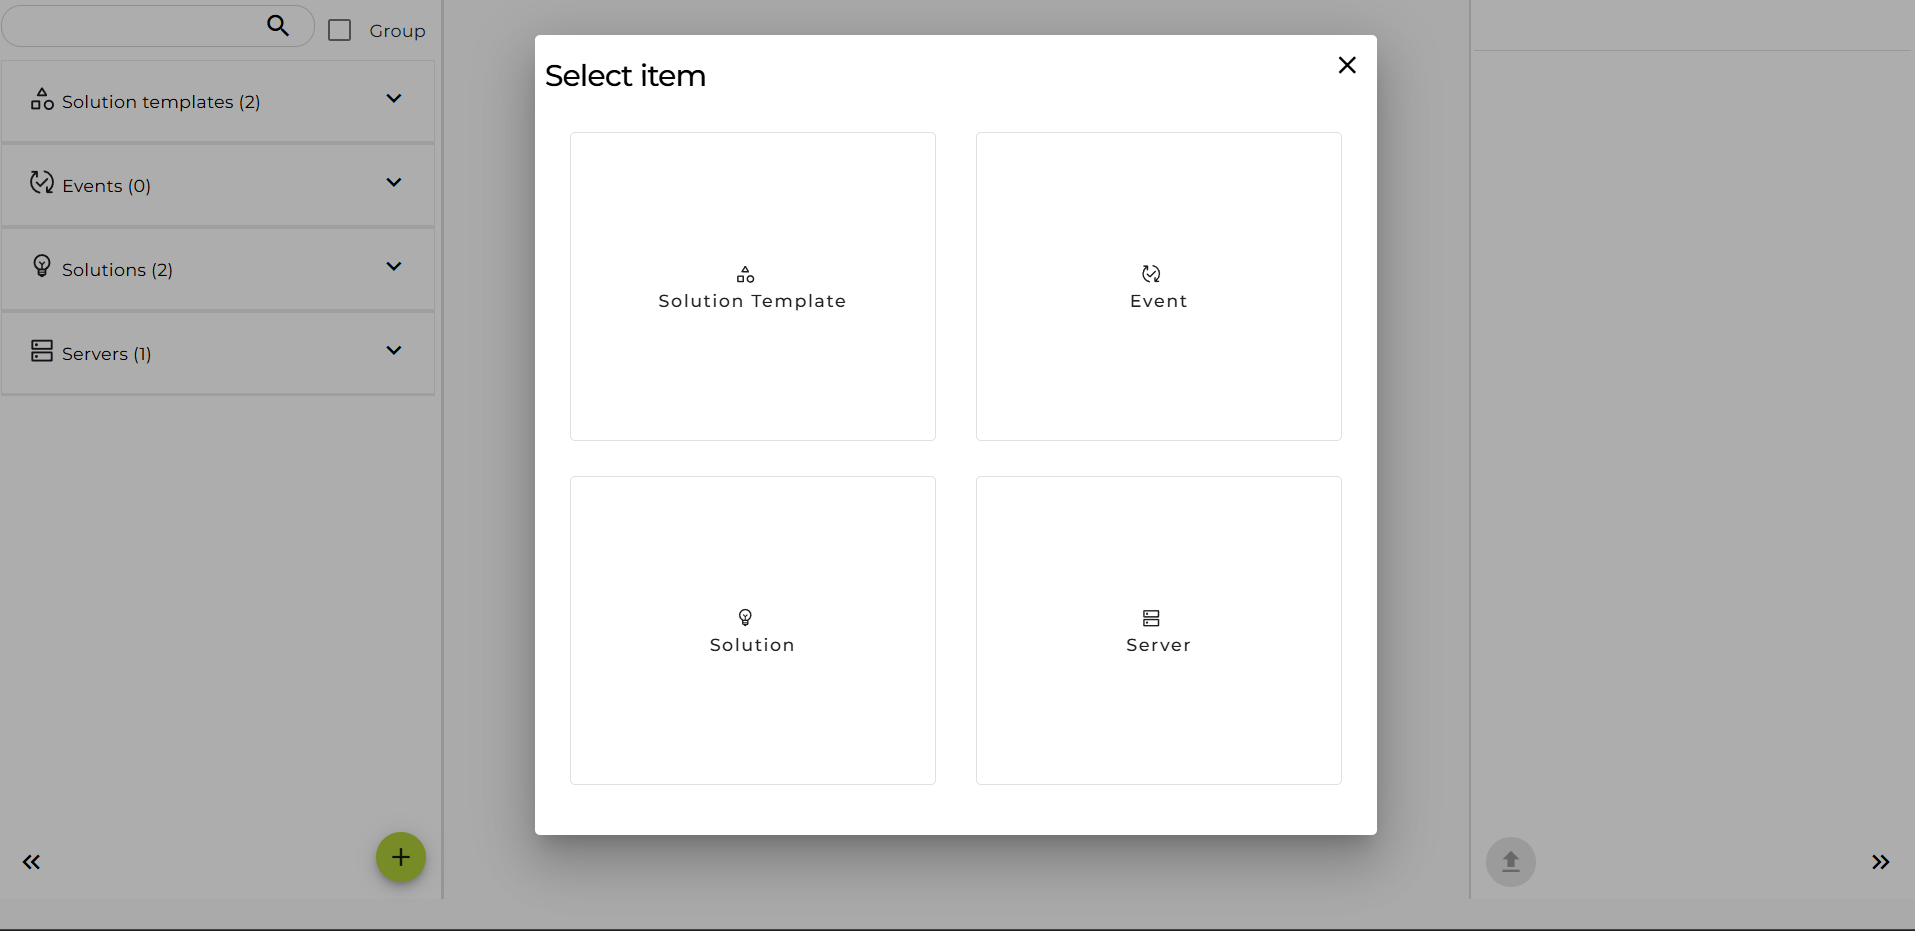
Click on the (+) button and select 'Solution'.
-
Select the relevant Solution Template.
Configure the solution as needed:
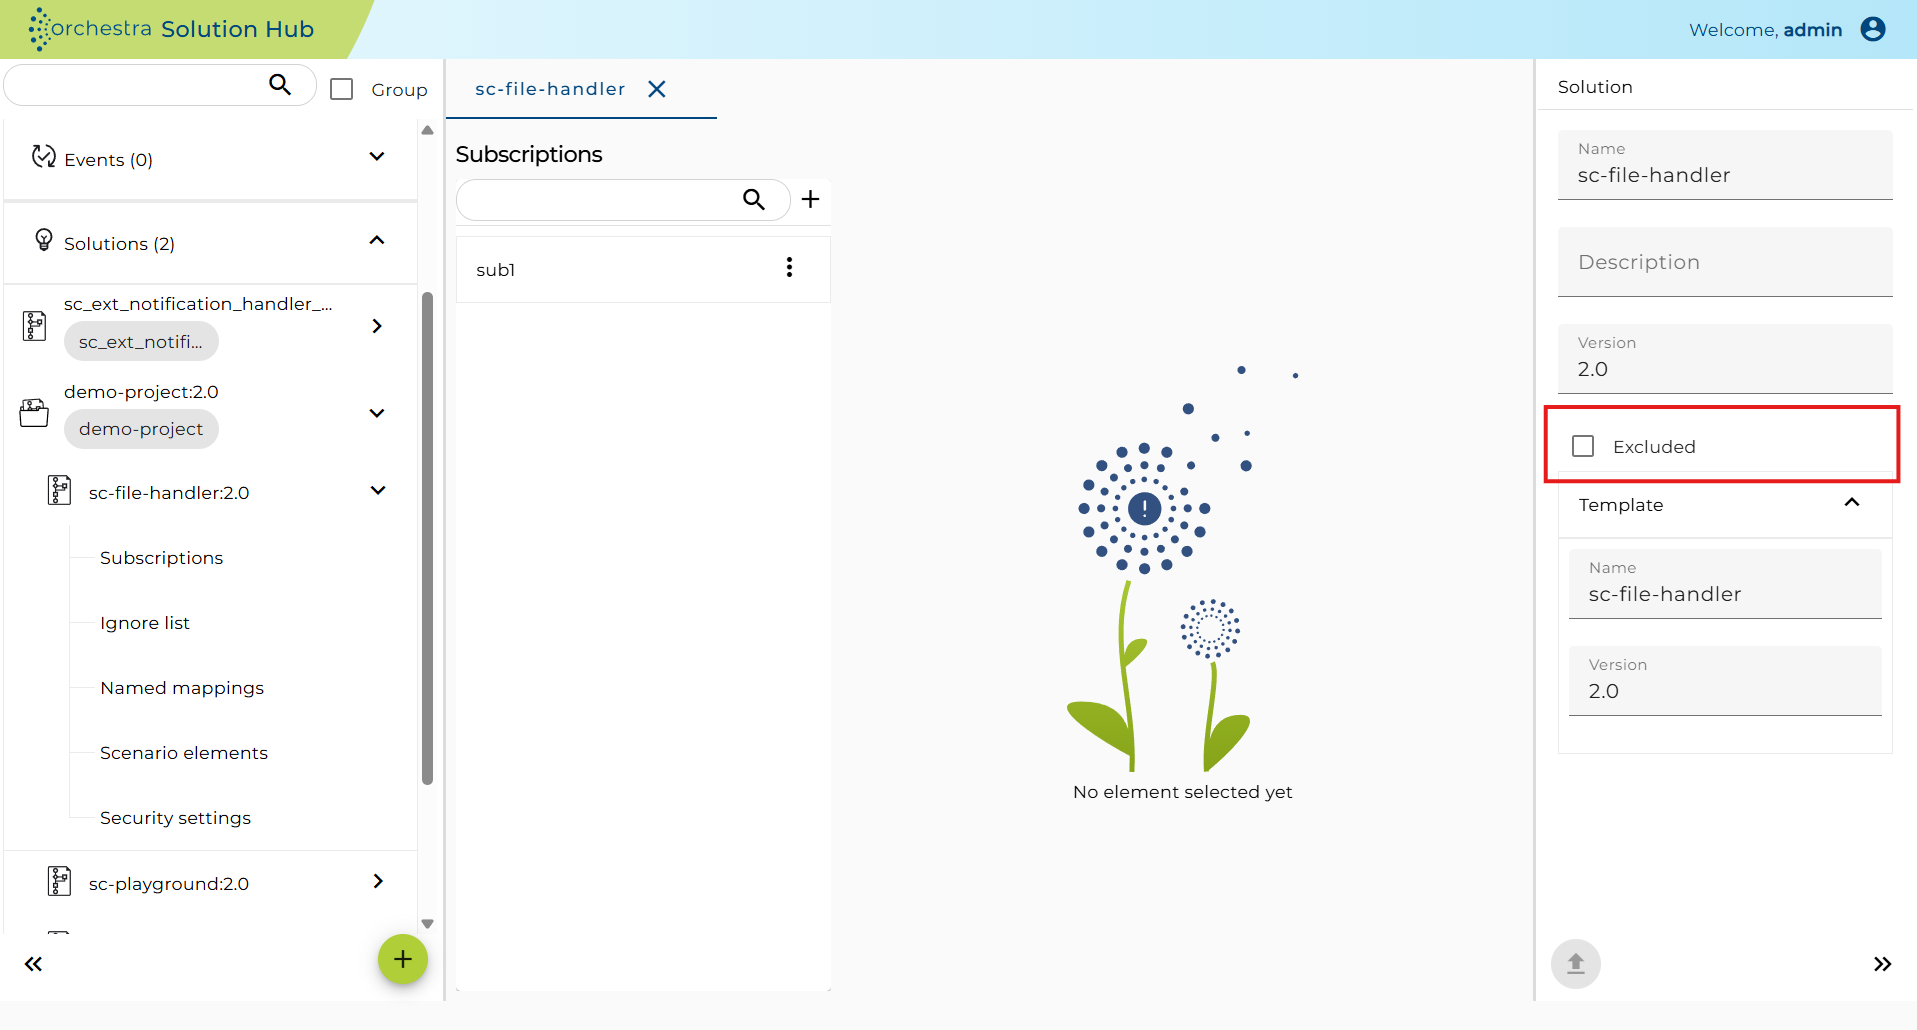
Exclude a scenario from a bundle
- Go to the Solutions tab in Solution Hub.
- Click the relevant solution bundle.
- Click the relevant scenario. The configuration will appear on the right panel.
- In the settings panel:
- Check the
Excludedcheckbox.
- Check the
When this option is selected, the scenario will be excluded from bundle processing and deployment.
Subscriptions
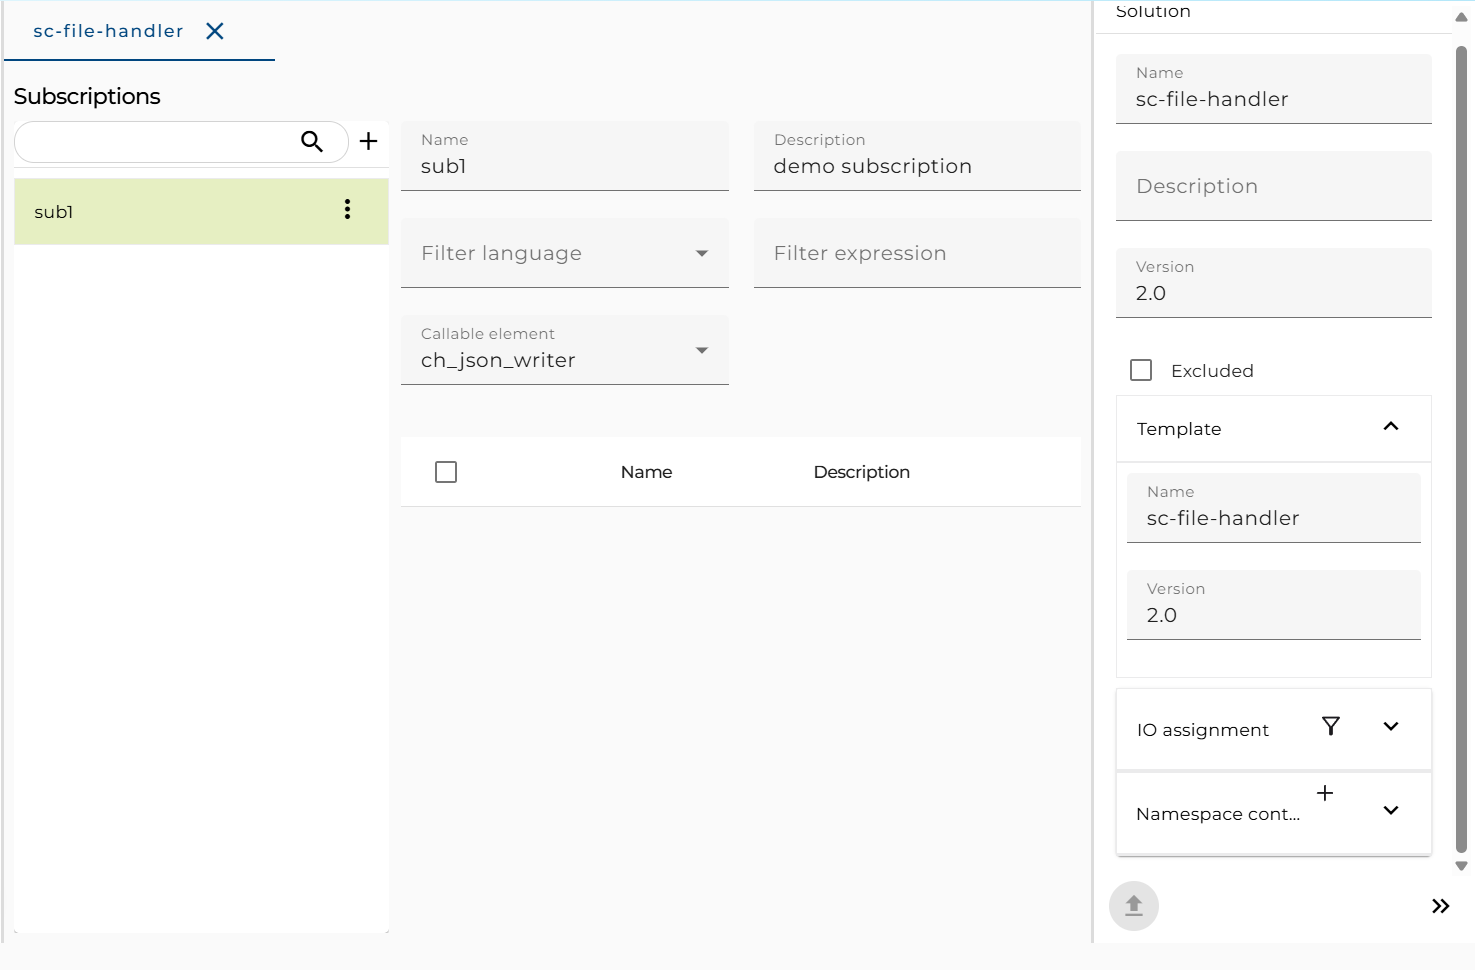
Subscription is used to bind callable elements to events. A solution can contain many subscriptions.
You can manage subscriptions by the following steps:
-
Select the relevant solution and open 'Subscriptions'.
-
Click the (+) button in Subscriptions to create a new subscription.
Input name and description. -
If you want to define a condition if the element should be called based on incoming data, input the filter language and filter expression.
-
Select callable element, which element should be called.
You can assign values to parameters by using IO assignment on the right sidebar. -
Select one or more events that the subscription accepts.
Ignore List
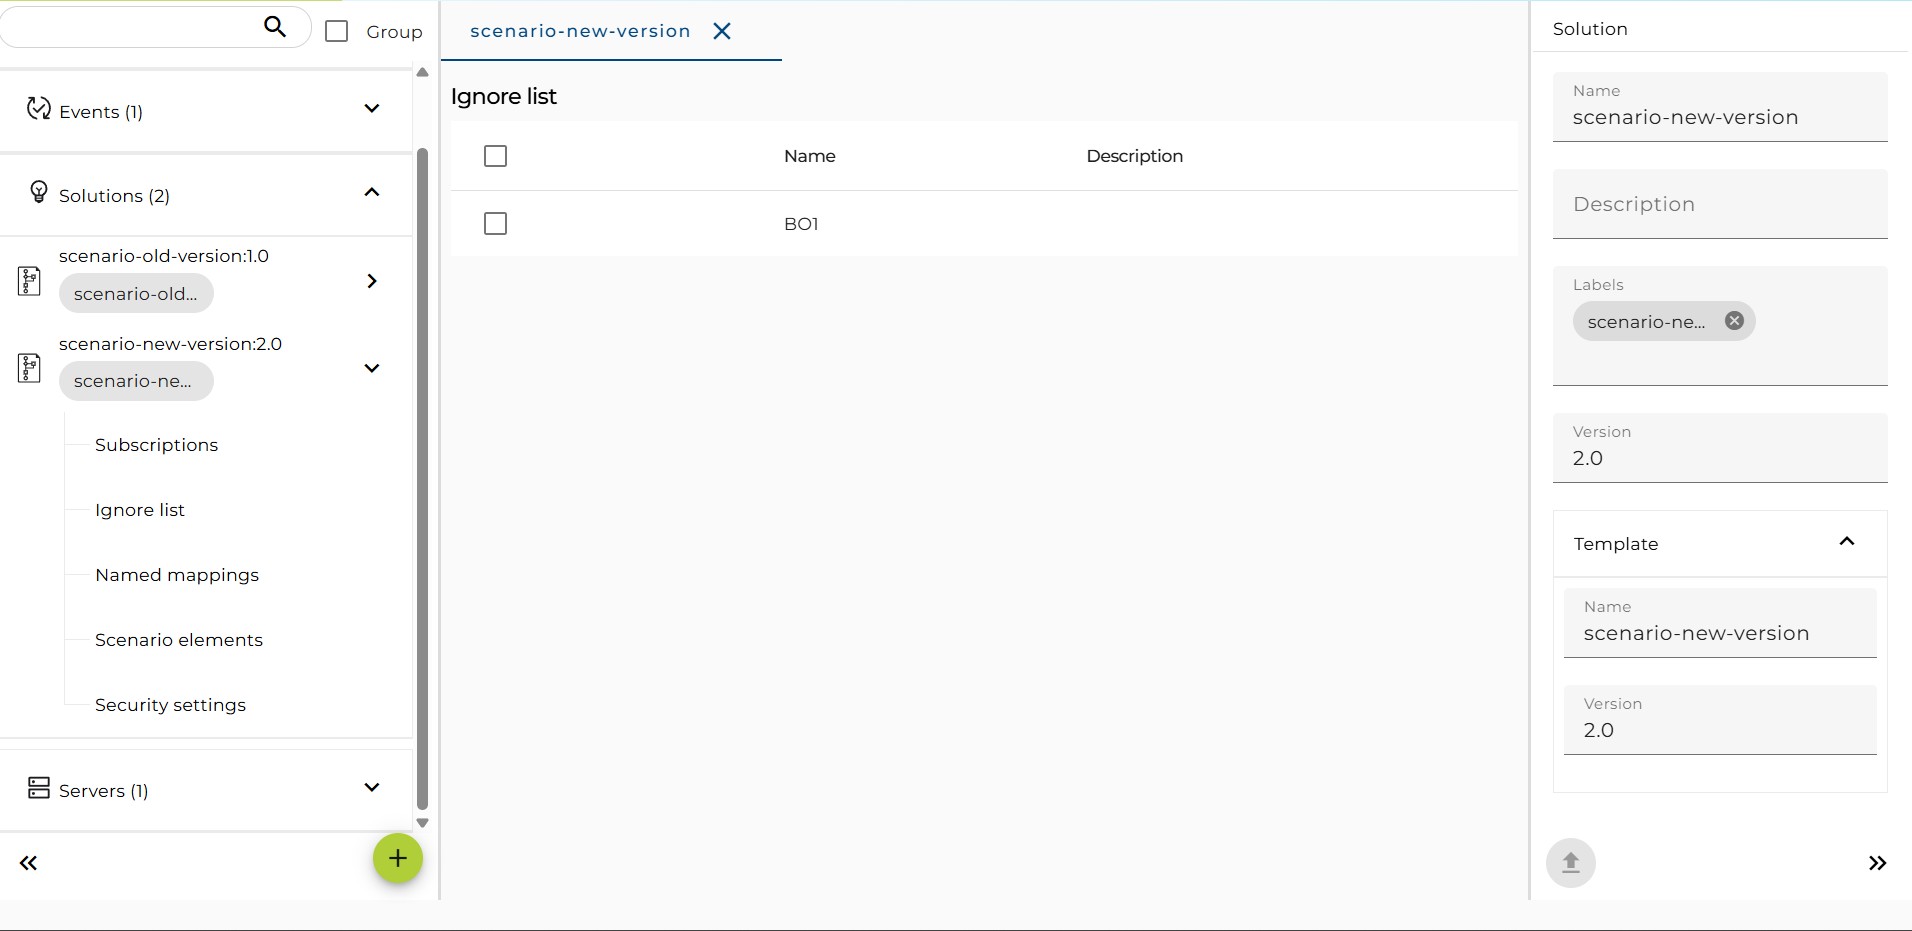
Ignore list is used to define events that will not be sent to any subscription of the solution.
You can manage the ignore list by the following steps:
-
Select the relevant solution and open "Ignore list".
-
All events will be displayed; you can select events to be ignored.
Name Mappings
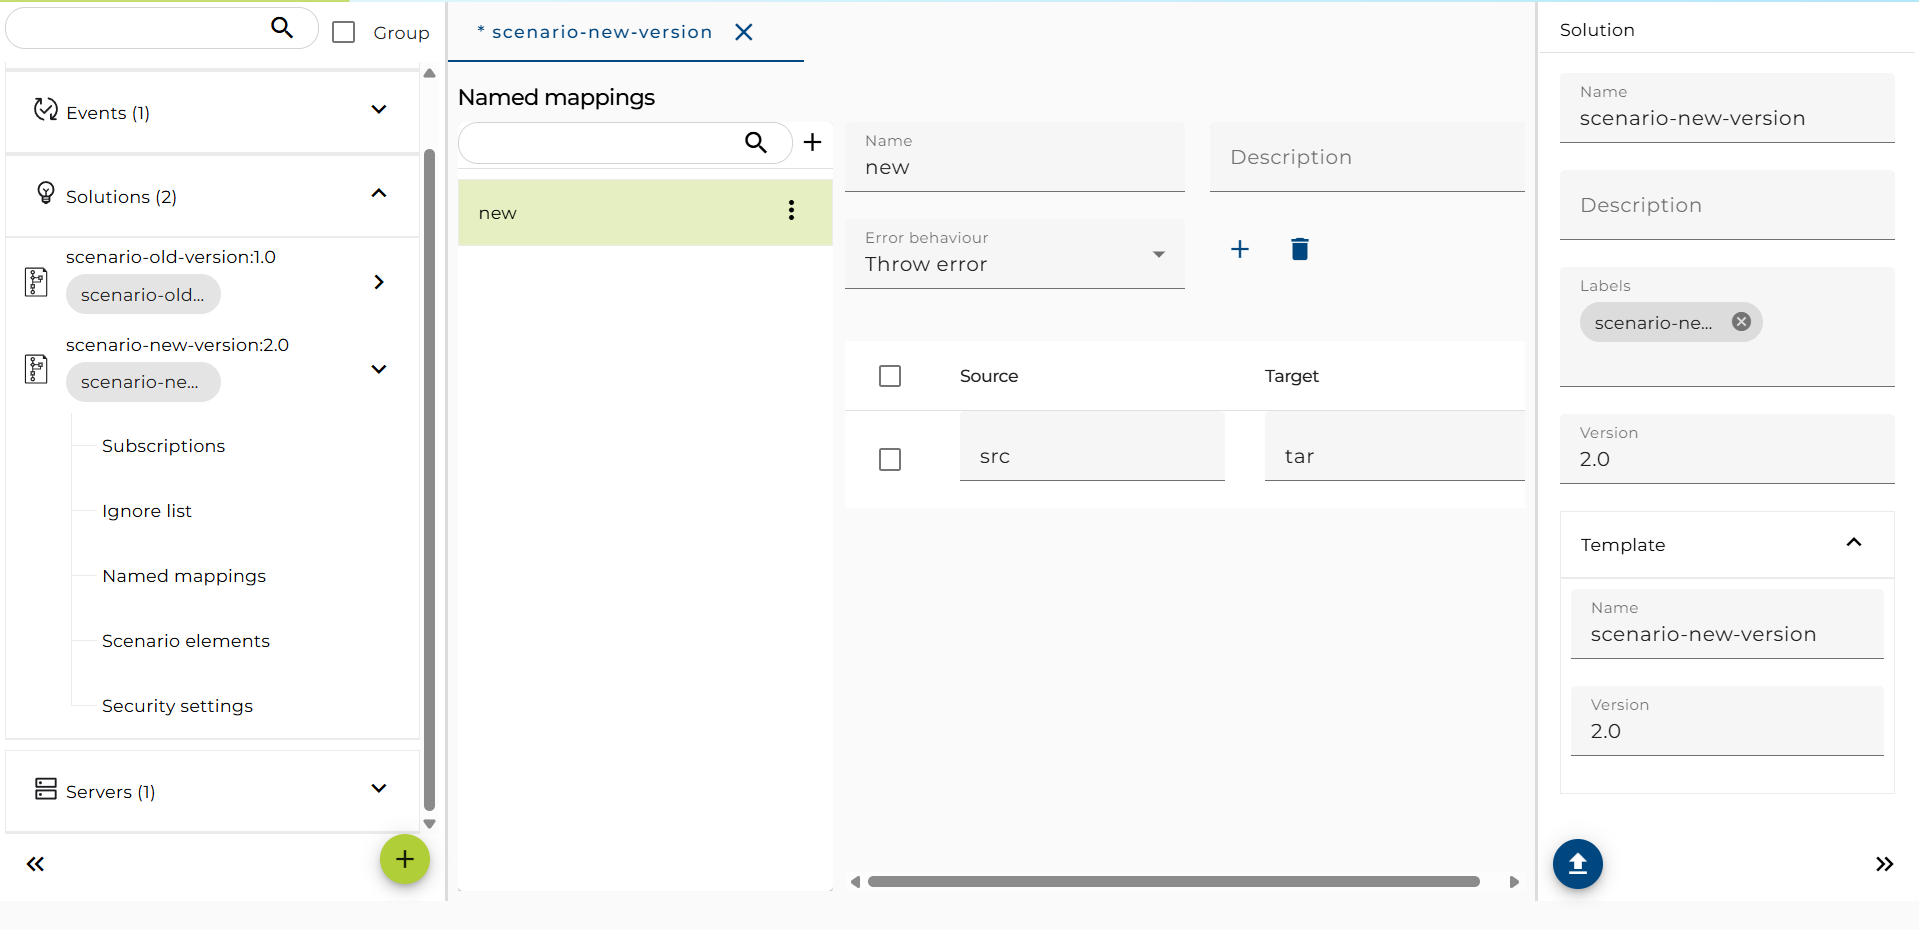
A named mapping is used whenever an incoming value (source) has to be translated to a target value. In order to do so, one can configure a list of source values and the corresponding target values.
A defined named mapping is invoked by use of the function:
resolveNameMapping(String mappingName, String inputValue)
If this function is invoked within an assignment expression or any other Java source, the inputValue is translated to an output value by applying the rules defined by the named mapping.
Instead of a named mapping, one can use lookup tables. This is the preferred mechanism nowadays.
To configure named mappings:
-
Select the relevant solution and open 'Name Mappings'.
-
Click the (+) button in Name Mappings to create a new name mapping.
Input name and description. -
Click the (+) button in the table to create an item. Input Source and Target in the table.
Scenario Elements
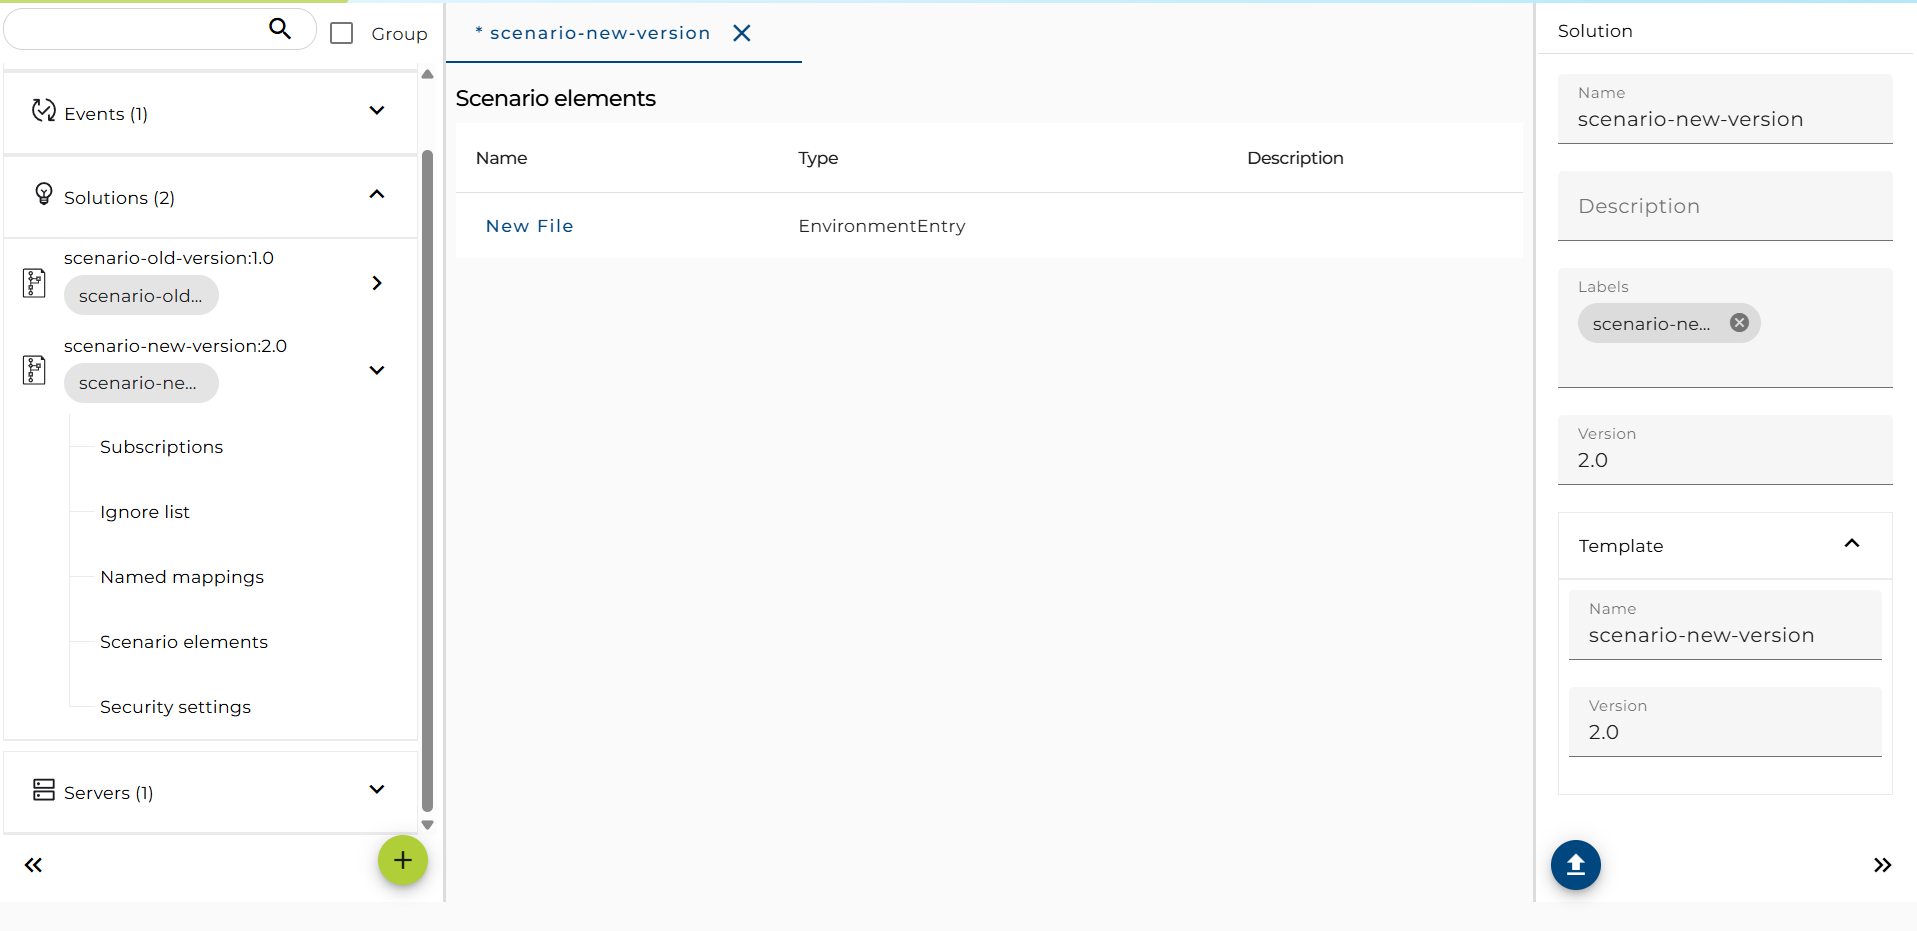
Some scenario elements can be re-configured in terms of their properties (e.g., environment entries, lookup tables, process models).
To re-configure scenario elements:
-
Select the relevant solution and open "Scenario elements". A list of configurable elements is displayed.
-
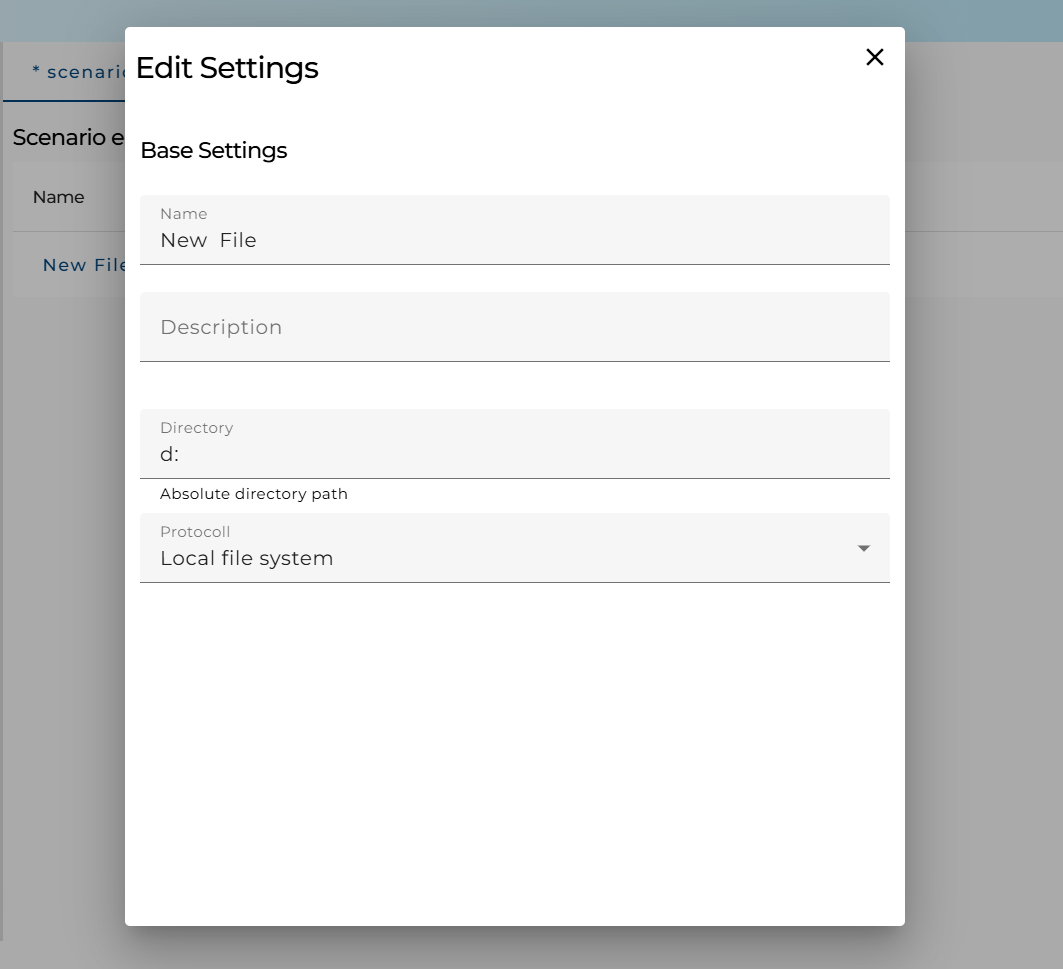
Click the element you want to configure.
The edit dialog will be opened. -
Edit configuration as needed.
Create a new scenario element
To Create a new scenario element:
-
Select the relevant solution and open "Scenario elements"
-
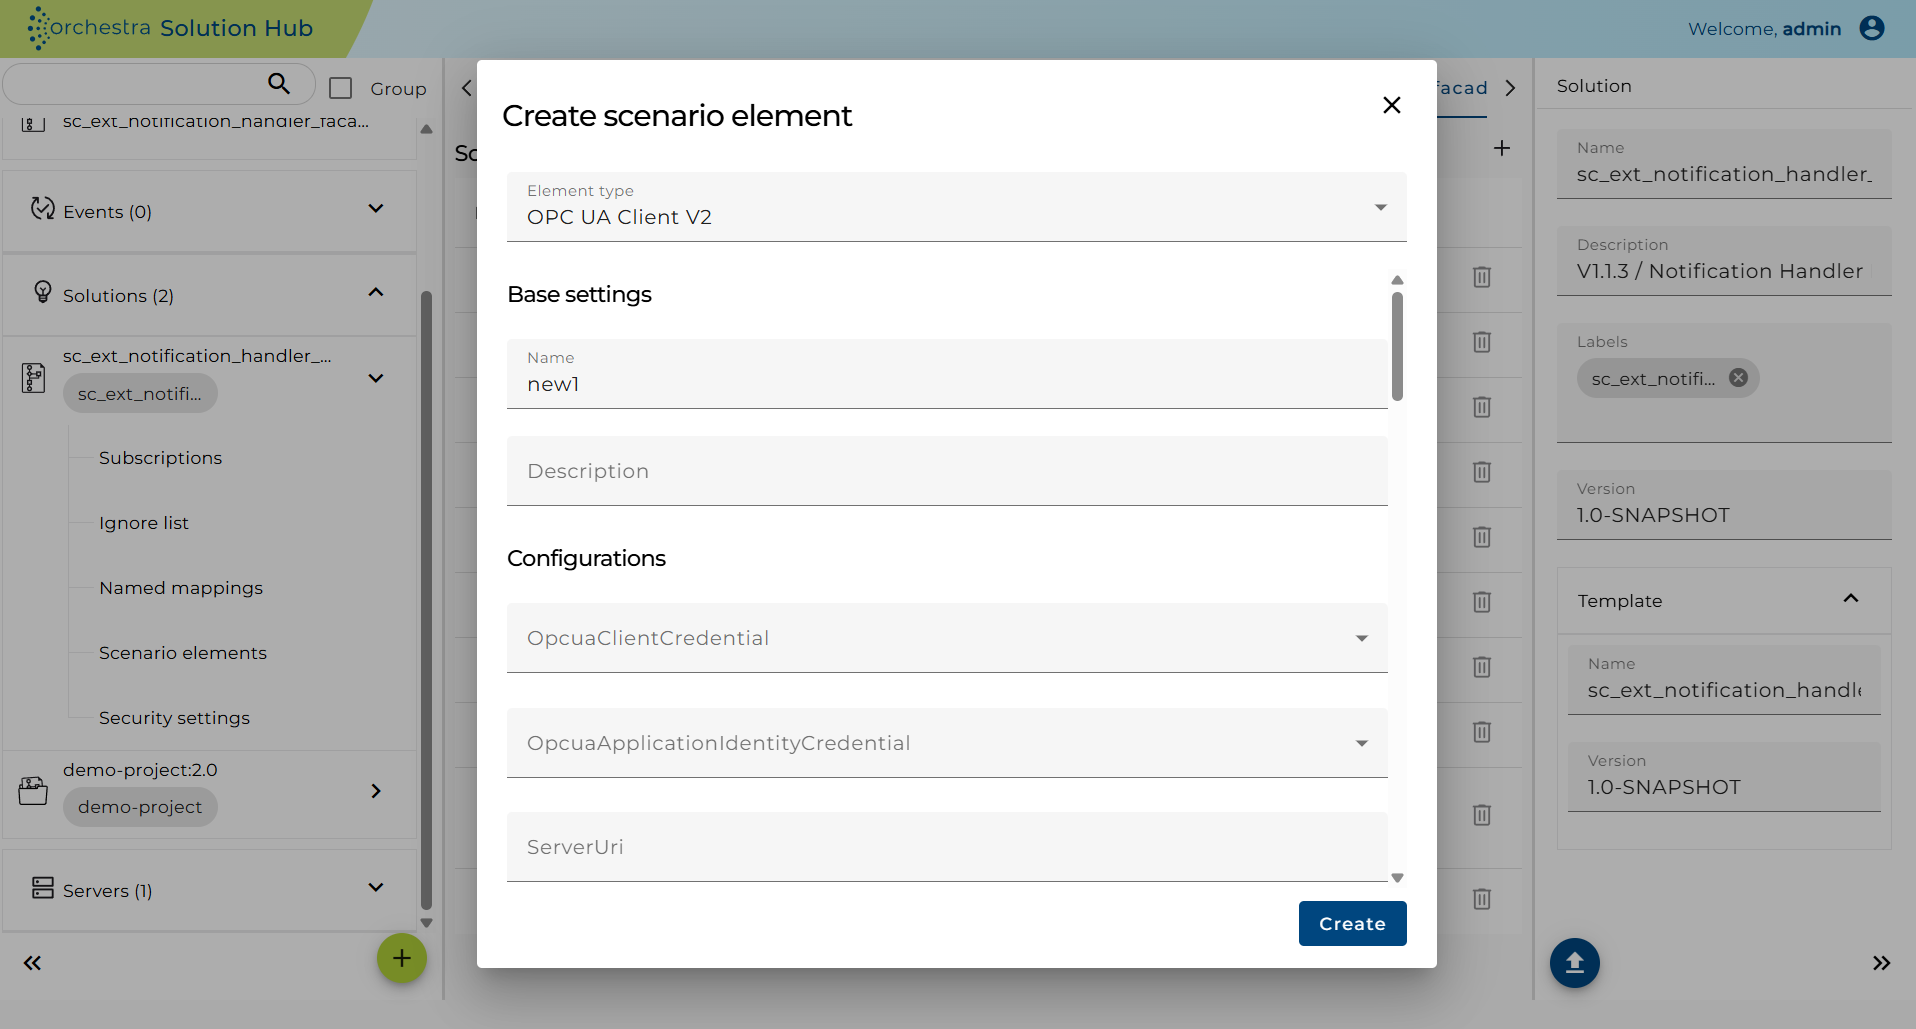
Click the (+) button at the top right corner. The create dialog will be displayed.
-
Select the element type you want to create.
-
Configure the required settings.
-
Click “Create”. The scenario element will be added to the table and can be edited later if needed.
The element types that can be created will come from the template file in the PSC file. If “Creatable scenario element is empty” appears, no elements can be created for the current scenario, and the PSC file needs to be re-exported using Orchestra Core newer version.
Security Settings
You can manage credentials within the solution by the following steps:
-
Select the relevant solution and open "Security settings".
-
Click (+) to create a new credential.
-
Input name and description.
-
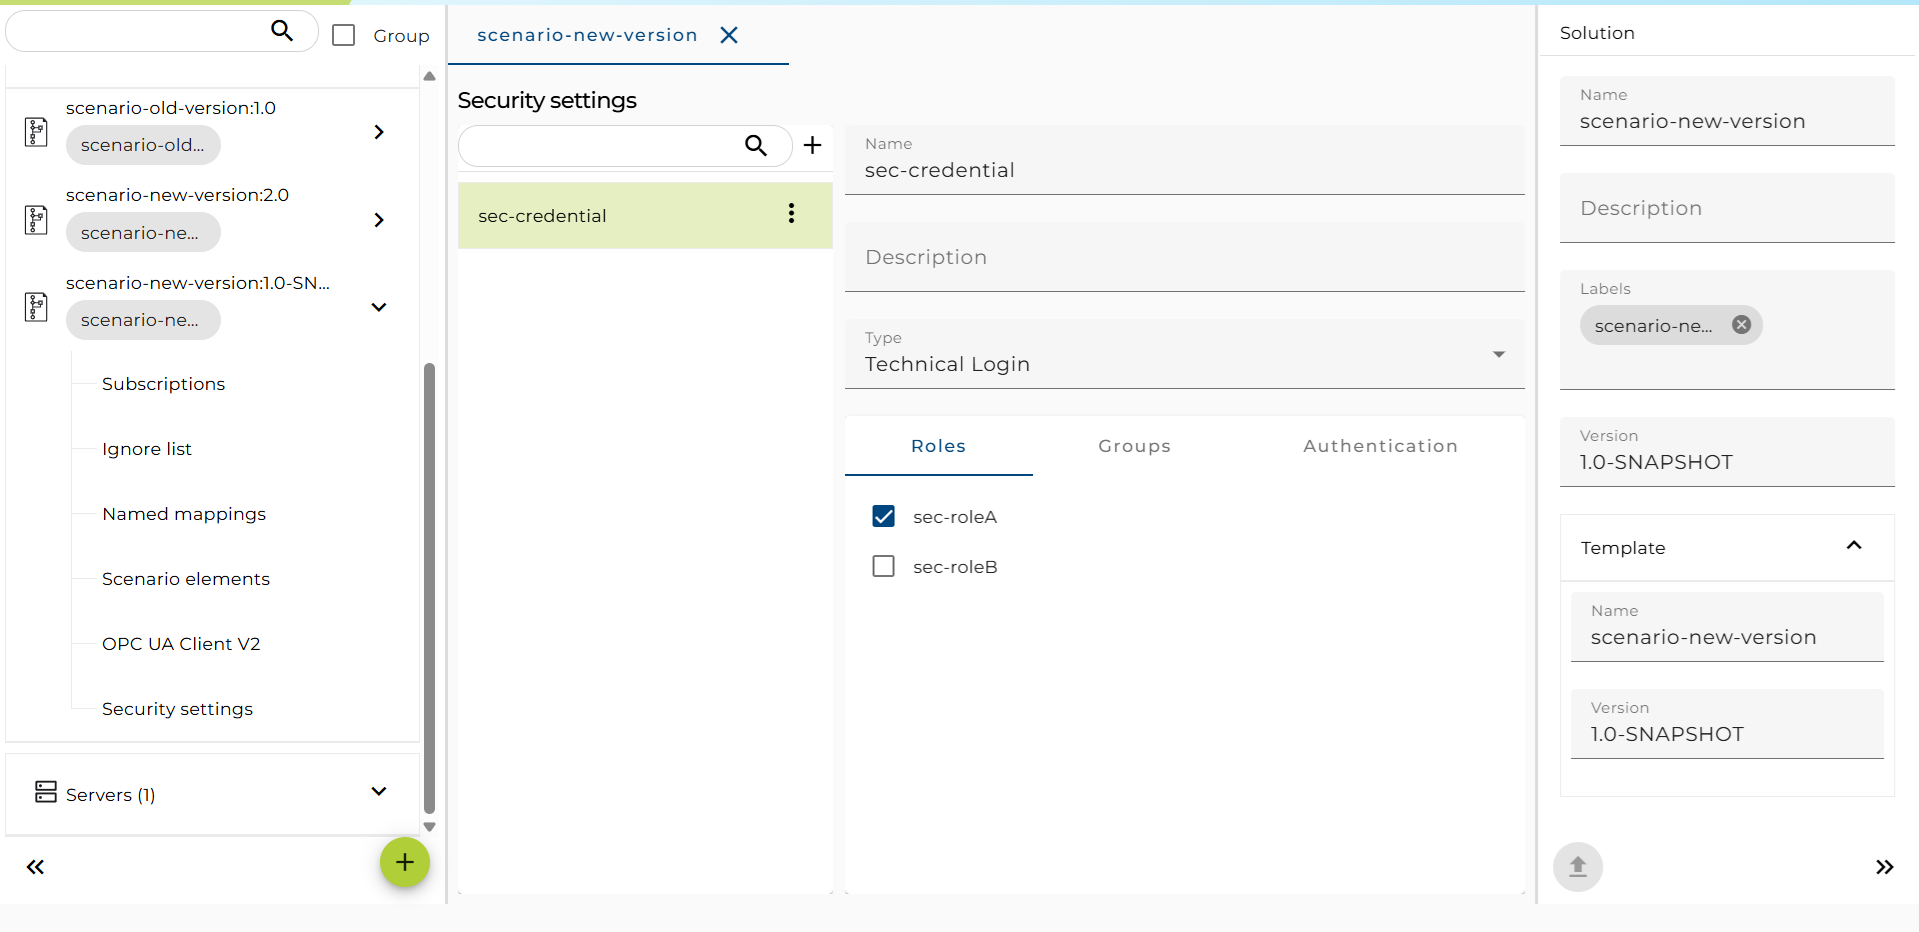
Select type of credential.
-
Define one or more roles of the credential under the "Roles" tab.
-
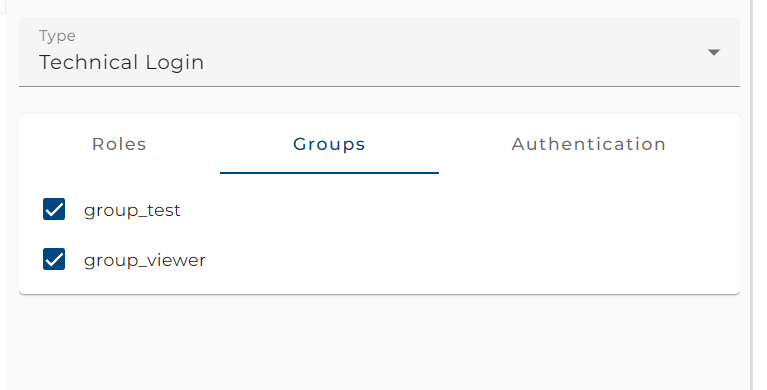
Define one or more groups under the "Groups" tab.
-
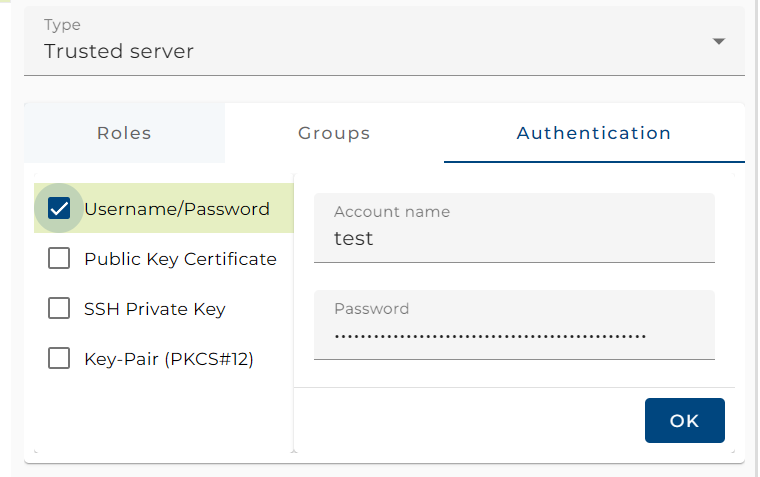
Define authentication of the credentials by opening the "Authentication" tab:
- Select the authentication type to be defined.
- Configure as needed.
- Click "OK" to confirm the configuration.
The checkbox is ticked to indicate the confirmed authentication. - To disable the authentication type, un-tick the checkbox of that type.